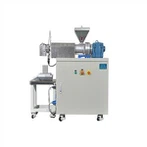
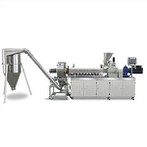
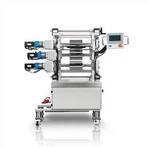
POTOP torque rheometer is mainly composed of transmission box components, operating box components, mixing components, power Components, operating table components, rack components and software operation components.All parameter Settings, systems System control and data recording are operated/displayed on a computer equipped with measurement and control software.

The mixing chamber is the core part of the mixing assembly, so it is very important to keep the mixing chamber clean.Now let's talk about how to clean the mixing cavity correctly The following points need to be paid attention to before cleaning the mixing chamber:
1) At a certain temperature, thoroughly clean the sample material containing the surface residue of the front, middle and back plates;
2) When cleaning the equipment, you should wear protective gloves to prevent burns!As the rotor rotates, Do not clean any parts to avoid serious accidents;
3) After the test is completed, the material will adhere to the wall of the mixing chamber. It is recommended to use PVC OR with strong stability Polyolefin material cleaning, or under 150 degrees using unvulcanized rubber cleaning;
4) If the use of wall adhesion without strong corrosive materials, after the completion of the test can not be cleaned with other materials Wash;
5) Do not use any hard or sharp tools to clean the front, middle and back plates of the rotor or the mixing chamber Richard!Only use a copper brush or copper scraper to complete the cleaning work;
6) All parts removed should be placed on wood or other non-metallic surfaces with good insulation performance. Prevent unnecessary heat loss;
7) In order to avoid heat loss of the plate and rotor of the mixing chamber, the cleaning of materials should be completed quickly.

Correct cleaning steps for mixing cavity of torque rheometer:
1) Loosen the two slotted hexagon screws to open the steering rod and open the mixing chamber;
2) Unload the front plate of the mixing chamber through the handle and place it on the corresponding support of the operating platform;
3) Through the left and right handles, remove the mixing medium plate from the guide posts at both ends and place it on the corresponding position of the operating table;
4) First clean the residual materials on the rotor surface to ensure the minimum heat loss of the rotor as far as possible;
5) Clean the residual materials in the inner wall of the mixing chamber of the front plate and the middle plate.
A: Remove the rotor Loosen the leftward and remove it after turning it clockwise about 30 degrees; After turning the right rotor counterclockwise by about 30 degrees, loosen the right rotor and remove it.
B: Use a copper brush or copper scraper to thoroughly clean the rear wall of the rotor and the shaft sleeve;Then press the rotor immediately Do the opposite and reassemble and lock to prevent unnecessary heat loss.
6) Clean the medium plate
A: Thoroughly clean the plate in the mixing chamber with a copper brush or copper scraper;
B: Quickly fix the cleaned intermediate plate to the guide posts at both ends.
7) Clean front plate
A: Clean the front plate of the mixing chamber thoroughly with a copper brush or copper scraper;
B: Fast clean and tight The front plate of the cavity is fixed on the guide posts at both ends, and the steering tie rod is closed. After cleaning, ensure that the temperature has reached the specified requirements before the next test.